
So, your dirty Glock could use a bit of work, but you don’t know where to start? Don’t worry, we’ve got your back. Everyone starts somewhere, and even the most experienced shooter can use a bit of a refresher from time to time.
Here’s everything you need to know about getting that dirty Glock handgun clean again.
When to Clean Your Dirty Glock.
Only you can really know when your Glock handgun is a dirty Glock handgun. That said, there is good practice, and bad practice when it comes to maintaining your firearms.
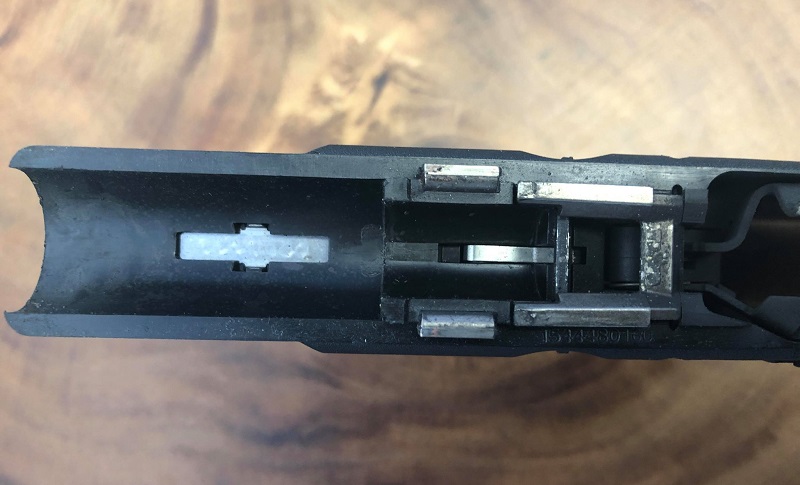
Bad practice is pretty easy to spot. For example, the dirty Glock we used for this post is a pretty good reference. If your Glock is starting to look like the one in the images you’re about to see, then there’s a pretty good chance that it’s time to get cleaning. If you let it go even further, you can expect serious problems to start coming up with your handgun.
Good practice is simple. Give you Glock a quick cleaning after every trip to the range. This will cut down on wear and tear to the weapon, and make your monthly firearm’s maintenance a lot easier.
Yes, I said monthly. Once a month at the minimum you should be taking all of your firearms out and maintaining them. If you do this simple action, you’ll find that your firearms will last much longer. Take care of the tools you expect to keep you safe in a bad situation. They’ll take care of you in return.
What You Need Before You Start.
Peace and quiet. No for real. The first thing you need before you start cleaning your weapons is a space that’s free of distractions. Ensuring that cleaning your guns is you time is a paramount part of this exercise. Some of the best ideas I’ve ever had came during gun cleaning time. So find your space, own it, and make sure it stays distraction free. Or, at least as distraction free as your kids will allow.
Next, you’re going to need a proper weapons cleaning kit. We recommend all of the solutions below. Some are multi-purpose, others are specifically for handguns. It depends on what you’re looking to do with your cleaning gear, but it should be as simple as choosing the kit that best suits your needs.
Clear and Disassemble your Glock.
The first step to cleaning your dirty Glock is to get the weapon ready for maintenance. To do this, there are two pretty simple steps you need to take to ensure that the weapon is safe and prepared to get clean. Failing to do these steps properly could adversely impact you, someone in the vicinity of your firearm, or the firearm itself.
So make sure you do these steps properly. No one is above safety, and it’s a justifiable fact that 100% of negligent or accidental discharges happen by mistake.
Clearing your Weapon.
This may seem like a no-brainer, but to some people common sense isn’t to common. The first step when handling any firearm in this fashion is to ensure that the device is clear of any ammunition. This is done to prevent you from accidentally discharging a round that may still be in the chamber after several weeks of carry, or a trip to the range.
To clear your Glock, the first step is to eject the magazine. You do this by hitting the magazine ejection switch, and physically removing the magazine. Just because a firearm does not have a magazine inserted however, does not mean that it is clear. Next, you’ll want to pull the slide to the rear, ejecting any rounds that may be chambered in the weapon. Regardless if a round ejects from the handgun or not, you need to both physically and visually inspect the chamber of the handgun to make sure there is not a round chambered inside.
Once you have ejected the magazine, and both physically and visually inspected the weapon to ensure there is no round in the chamber, the weapon is clear. You are now ready to disassemble the weapon.
Disassembly Process.
After you have cleared the weapon, you are now ready to disassemble it for cleaning. This process is quite simple on all models of Glock handguns. The first step in this process is to ensure you are wearing safety glasses. (I’m joking.)
First, point the cleared weapon in a safe direction and depress the trigger to release the firing pin. Next, you’ll want to grip the handgun with your dominant hand in a fashion that allows you to pull the slide to the rear about 1/10 of an inch. Pulling the slide to far to the rear will cause you to have to repeat the first step. If done correctly, you should now be able to push down on the slide lock lever and release the slide from the handgun’s frame.
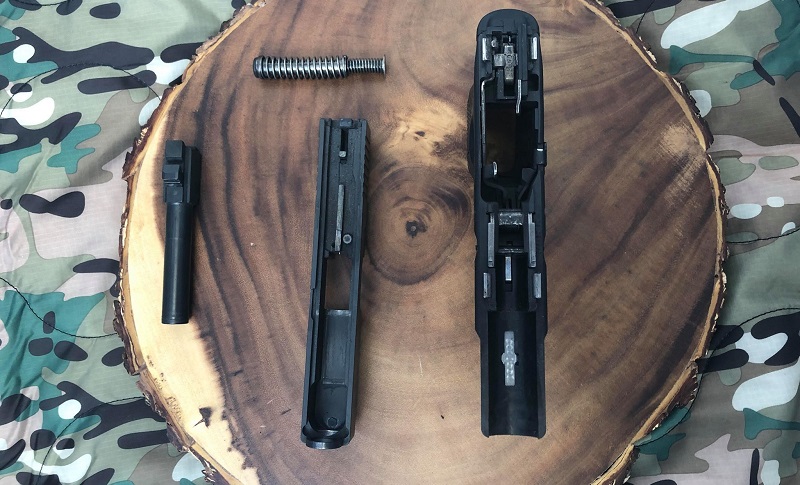
Following this, you can disassemble the slide into the other main components of the weapon. Remove the recoil-spring assembly first, and then take the barrel out. Your dirty Glock is now ready for cleaning. If you’re a visual learner, here’s a video from IraqVeteran8888. He goes way more in depth than you need to.
How to Clean a Glock Barrel.
For me, I personally clean my dirty Glocks the same way every single time. Starting in one place, and working my way through the main pieces in order helps me keep everything situated in my brain housing group. This may be different for you, but I always start with the barrel of my Glocks first.
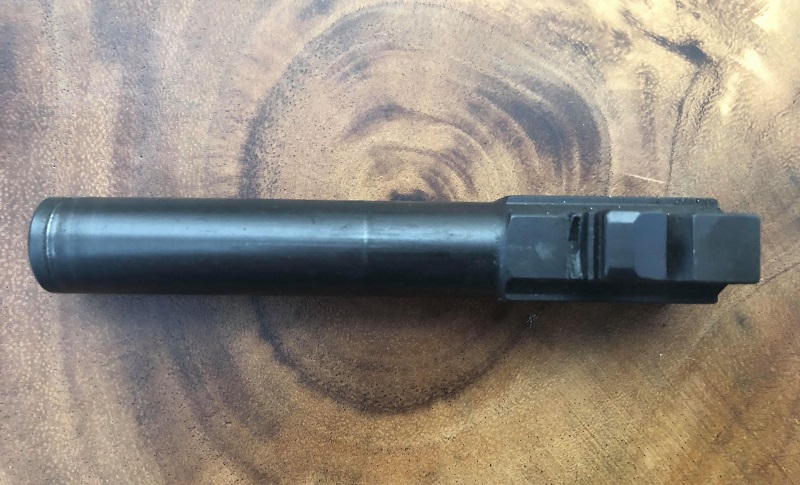
Starting out, you’ll want to wet down a cleaning patch with your choice of cleaning of solvent. Run this from the feed ramp side through the end of the barrel a few times until you have a nice coat of solvent inside. Next, grab your appropriate caliber bore brush, and run that through the bore in the same direction several times to ensure you are getting any built up carbon or debris loose from the inside of the barrel. You want to always run anything you are putting through the bore of your Glock barrel in the same direction as rounds travel. Doing this prevents you from doing any damage to the inside of the barrel that could cause issues with the weapon later down the road.
Next, you’ll want to put use an all purpose cleaning brush, or tooth brush, to clean the outside of the barrel. Make sure you pay extra close attention to the barrel feed ramp and hood. Last, give the outside of the barrel a nice coat of solvent, and then dry it off with an unused patch.
How to Clean a Glock Recoil-Spring Assembly.
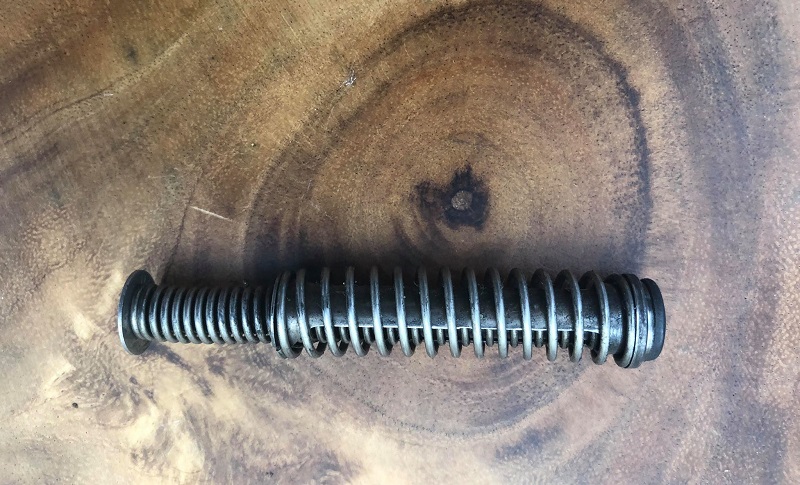
The recoil-spring assembly doesn’t require as much attention as other parts. Here, all you really need to do is scrub the part with your all purpose cleaning brush. Use a light coat of solvent to help break down any built up carbon as required, and ensure the piece is dry before you set it off to the side.
You can also use a q-tip to get in tight around the spring. This isn’t required, but it does help with getting more carbon build up off during more intense cleaning sessions.
How to Clean a Glock Slide.
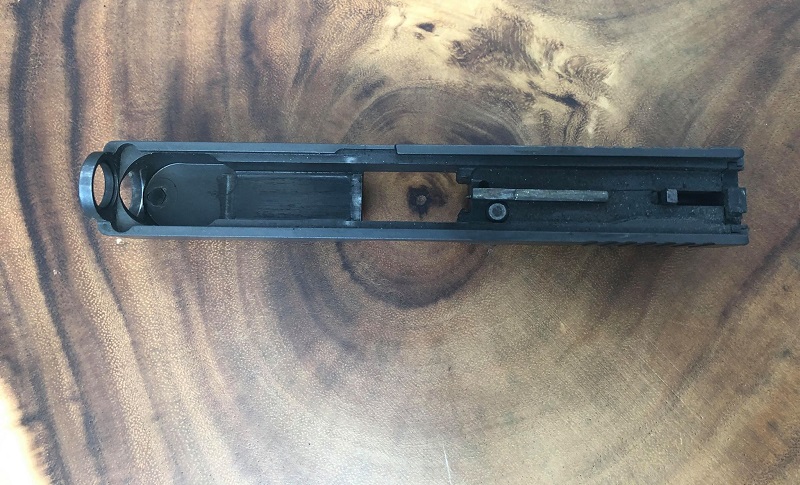
The slide is probably where you’re going to spend the most time cleaning. You’ll begin here with your all purpose cleaning brush once again. Ensure that you are paying extra attention to the breech face, the extractor, and the area around the extractor. While it’s advisable to use some solvent during this process, you want to be careful not to allow any to get inside of the firing pin channel. Doing this could cause a build up of solvent which will collect grime over time.
Once you have sufficiently scrubbed down the inside of the slide, use q-tips to get into the rail cuts. Here, you should notice a large amount of gunk coming out onto the q-tips. Repeat this process until the q-tips come out almost the same color before moving onto the final step in cleaning the inside of your slide.
Now that you’ve cleaned out your rail cuts, and scrubbed the inside, use a slightly damp, solvent soaked patch to wipe the inside of the slide. With each swipe, you should see carbon build up wiping off. Repeat this process until your patches or rag are no longer picking up any excess carbon.
Finally, dry the entire slide with a dry patch or rag, and set the slide off to the side.
How to Clean a Glock Frame.
The frame of your Glock can be touchy with cleaning solvents. Be careful here, as an excess amount of some solvents could damage the polymer frame over time.
On the frame, we really want to focus down on anything metal inside of the frame. This includes the locking block, the trigger bar, the connector, the cruciform, and the ejector. On top of these items, we also really want to make sure we are cleaning any excess carbon build up and debris from any of the points that make contact with the slide. Use your all purpose brush often here, as it is your best friend.
When you’re finally satisfied with your work, ensure that you wipe any excess solvent from the weapon’s parts, and move onto the next step.
Inspection, Reassembly, and Function Check.
After you have completely finished cleaning all of the gunk out of your dirty Glock, it’s time to put it back together. This process Is pretty simple, but there’s a specific order in which you wanna do this. Ensuring that you complete this process the same way every time will ensure you have a Glock with a long life-span.
Here’s what you need to do.
Inspecting your Glock.
You need to thoroughly inspect each piece of your firearm every time you do maintenance on it. If you make a habit of checking these parts, you’ll have your Glock for a very long time. Going through each inspection point would be an entire blog article on it’s own, so we’re going to leave the explanation to Sootch.
The inspection part starts at the halfway point, but he gets bonus points for having a video recap of everything listed above.
Reassembling your Glock.
Here, we’re going to go in reverse order of the disassembly process. You’ll start by inserting the barrel into your slide. Next, the recoil-spring assembly is placed into the weapon locking the barrel into place. Last, you place the slide onto the frame, and pull it all the way to the rear ensuring that the slide is locked into place on the frame.
If done correctly, the weapon should now be reassembled and ready for a function check.
Proper Glock Function Check.
The first step in your function check is to ensure that the weapon is clear. I know, I know. You just put the weapon back together, of course it’s clear. We’re building discipline here, and you’re about to pull the trigger. Treat every weapon as if it’s loaded regardless of the situation. It’s not a toy, it’s a weapon.
Step one in your function check is ensuring that the slide locks to the rear when the slide stop lever is engaged. If this works, release the slide and move onto the next step. At step two, we’re going to ensure that the safety works. To do this, we pull on the trigger without engaging the safety lever. The trigger should not pull.
If we’re good so far, then there’s only two steps remaining. Next, we’re going to pull the trigger to the rear, you should hear an audible click telling you that the trigger pull worked. Now, hold it to the rear and cycle the slide. After that, slowly release tension on the trigger until you hear the weapon reset, this will be another slight audible click, and you should feel it in the trigger.
The last step is to insert an empty magazine, and pull the slide to the rear. If the slide locks back on the empty magazine, your weapon is ready to go and you no longer have a dirt Glock.
Conclusion.
Congratulations, you no longer have a dirty Glock. Weapon’s maintenance is a key part of firearm ownership, and everyone should partake. Sometimes it can seem like a tedious process, but it doesn’t always have to be that way. Cleaning your guns should always be an opportunity for you to learn something new about your firearm. The more reps you have cleaning, the better understanding you’ll have of how your weapon functions.
Thanks for reading our take on how to clean your dirty Glock. If there’s anything we missed, or any pro-tips you have to offer up, we’d love to hear from you down in the comments section.